Password Managers for Beginners: How to Start Without Losing Access
A practical beginner's guide to setting up a password manager, choosing a master password you won't...

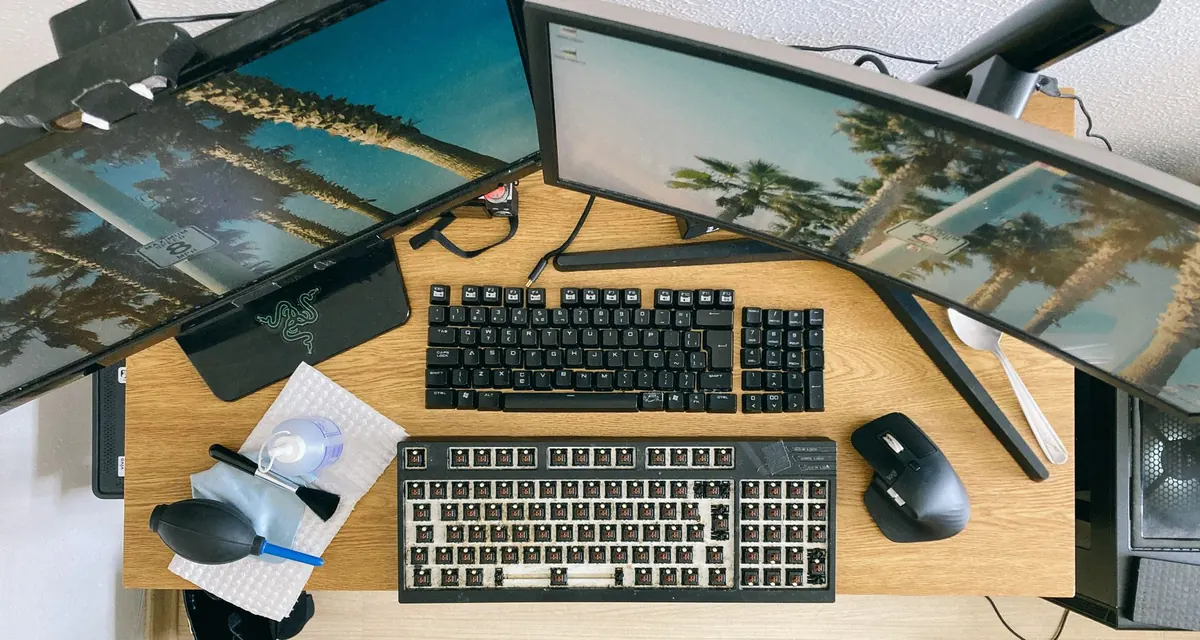
A second screen quietly changes how you work. References live on one side, the document you are writing sits on the other, and the alt-tab shuffle disappears. What stops most people is the assumption that a dual-screen desk means new monitors, a bigger desk and a pile of expensive accessories. It rarely does. The cost hides in three places — stands, cables and display settings — and each has a cheap, reliable answer. Here is how to build a two-monitor setup that works, one decision at a time.
Start with a tape measure, not a shopping cart. Note the desk's width and depth, whether there is a wall behind it, and where the nearest power outlet sits. Also note the height of your chair and where your eyes land when you sit up straight; that number decides how high the top of each screen should be.
The width adds up fast. A 27-inch 16:9 monitor is roughly 24 inches wide including its bezel, so two side by side plus a small gap land close to four feet. On a 48-inch desk, the outer edges will overhang. If space is tight, drop the second screen to a smaller size, run it in portrait, or stack the pair vertically. A 24-inch monitor in portrait is about 13 inches wide, for example, and a second 24-inch in landscape is about 21 inches, so the pair can fit on a desk where two 27-inch screens will not.
Then look at the back of each monitor. Most have a VESA mounting pattern — commonly 100 x 100 mm on larger screens, 75 x 75 mm on smaller ones — and that is what every arm and bracket attaches to. Some monitors skip it entirely, and for those you need a riser or a shelf rather than an arm.
Check the desk itself, too. A clamp needs a flat top, enough thickness, and clear space underneath, with no steel frame or drawer box in the way. Measure the clamp opening against your desktop before ordering. Particleboard and hollow-core tops can crush under a heavy clamp, so sandwich a small piece of plywood above and below to spread the load.
Measure twice, buy once. A monitor that does not fit is never a bargain, no matter how low the price.
The stands that came in the box are free, and for a straightforward side-by-side setup they often do the job. If you need a few inches of height, a wooden riser, a small shelf or a sturdy stack of books works. The only rule is stability: if it wobbles when you nudge the desk, it is not a stand.
You can also repurpose an old monitor stand from a previous screen, as long as the VESA pattern and weight match. A monitor with a broken stand but a working panel can be mounted on a $20 fixed wall bracket instead of being replaced.
An arm buys back desktop space and lets you aim each screen exactly where you want it. Two single arms are usually cheaper than one dual arm, and they let you position the monitors independently — dual arms lock the screens into a fixed relationship, which is not always what a narrow desk needs. Check the weight rating, and make sure it covers the monitor without its factory stand attached. Gas-spring arms adjust with a fingertip; fixed-height arms cost less but need a tool to reposition.
The mounting method matters more than the brand. A C-clamp is the simplest and works on most desks. A grommet mount needs an existing hole. A wall mount needs proper anchoring, not drywall plugs alone. If an arm has a channel for cables, use it — that feature alone justifies a small premium.
If you are stacking screens vertically, a tall single pole or a dual vertical arm is often cheaper than two separate arms. If you are placing one screen in portrait, check that the arm allows 90-degree rotation and that the monitor's VESA plate does not block the ports.
Write down the ports on both monitors and on your computer before buying anything. HDMI and DisplayPort are the ones you want. DVI and VGA still work, but they cap you at older resolutions and refresh rates. If your computer has only one video output, you may need a USB-C dock, a DisplayLink adapter or a second GPU output; check before you assume the second screen will light up.
Use the shortest cable that reaches. Long, cheap HDMI cables can drop signal at 4K, and thin adapters sometimes refuse to carry audio or wake from sleep. Buy cables rated for the resolution and refresh rate you actually use: HDMI 2.0 for 4K at 60 Hz, DisplayPort 1.2 or higher for higher refresh rates. If both monitors support DisplayPort MST, you can daisy-chain them with one cable from the computer, but the last screen in the chain may be limited. When in doubt, run one cable per monitor.
Label both ends with tape before you route them. It sounds fussy, but it saves twenty minutes the next time you swap a machine or troubleshoot a blank screen. A $5 pack of hook-and-loop ties keeps the cables from pulling on the ports.
Hardware is only half the job. Once both screens are connected, open your display settings and choose Extend these displays, not Duplicate. Duplicate mode wastes the second panel by showing the same thing twice.
Arrange the screens in the settings window to match their physical positions. If the left monitor is actually on your right, dragging a window between them will feel backwards. Drag the monitor icons until they line up. Then set the primary display to the one you use most — usually the center or the one directly in front of you.
Take five minutes to set a wallpaper that spans both screens or a different solid color on each. It makes the boundary obvious and helps you drag windows to the correct side without thinking.
Two monitors do not have to mean two new monitors. Office liquidators, university surplus sales and local classifieds are full of 24-inch and 27-inch screens for a fraction of retail. Look for a model with HDMI and DisplayPort, a VESA mount and at least a 60 Hz panel. Avoid anything with a cracked screen, a dead pixel in the center, or a flickering backlight.
Test before you pay. Bring a laptop and a cable, display a white image and a black image, and check for scratches, uniformity problems and stuck pixels. Ask whether the stand and power brick are included; replacements can cost more than the monitor. If the seller will not let you test it, treat the price as a gamble, not a deal.
Refurbished business monitors are another good route. They are built for long hours, often have height-adjustable stands, and come with a warranty from a reputable seller. A three-year-old Dell or HP panel can outperform a cheap new no-name screen and cost less.
A two-monitor desk is not a luxury project. Measure first, use the stands you own, add an arm only where it solves a real problem, and buy cables that match your ports. Then spend ten minutes in display settings. The result is a workspace that feels twice as wide for a fraction of what you expected to pay.
Photo: Athena Sandrini / Pexels
A practical beginner's guide to setting up a password manager, choosing a master password you won't...
Cold slows the chemistry inside lithium-ion cells, so your phone misreads its own charge and shuts down...
Budget active noise cancellation handles train rumble and bus drone surprisingly well, but comfort, call...